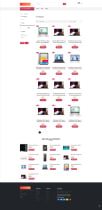
Electro Shop - Ecommerce Website and CMSElectro Shop - Ecommerce Website and CMS
Single vendor Laravel E-commerce solution with CMSElectro Shop - Ecommerce Website and CMS
Single vendor Laravel E-commerce solution with CMS
Overview
Laravel E-commerce Solution with CMS
ElectroShop is a complete E-Commerce system to easily start your online E-Commerce business. It has a powerful admin panel for managing products, categories, brand, orders, and much more. ElectroShop is extremely optimized for giving customers the best purchasing experience. The system is highly performant and protected against SQL injection, XSS, CSRF, and other attacks. Some dependencies need to be maintained properly in a sequential order. Please try to follow that. Log InHow to Use the eCommerce Platform The following is a detailed guide on how to use the platform. After successfully setting up the project, you will need to organize your website. Here's what you need to do: Go to www.example.com/admin/login. Use the following credentials to log in:
Email: [email protected]
Password: 12345678
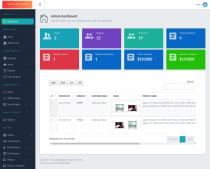
After logging in, you will see a beautifully customizable admin dashboard, which will give you a brief overview.
On the left side, you will see various menus that allow you to efficiently manage your website.


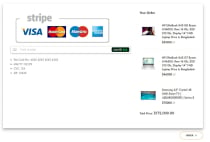
On the other hand, clicking on the Stripe Config button will allow you to set the Stripe payment gateway API key dynamically. This makes it easier for you, as an admin, to manage the Stripe configuration efficiently, giving you more control and saving time.

Demo URL
https://electroshop.devscodebd.net/
Admin Panel
https://electroshop.devscodebd.net/admin/login Email: [email protected] Password: 12345678
Features
Key Features :
- Customer Management
- Offline Customer Management
- Category Management
- Brand Management
- Product Management
- Bulk/Excel Product Upload Management
- Order Management
- Offline Order Management
- Email Sent Management
- Stock Management
- Reports
- Sliders
- Banners
- Terms & Condition
- Privacy & Policy
- About us
- Settings
- Payment getway setting
Requirements
Server Requirements:
- Minimum PHP version (PHP 8.0) and Laravel Version 8.75
- Required PHP extensions (like mbstring , openssl , pdo , curl , gd, zip, fileinfo, pdf)
- Supported databases (usually MySQL)
Instructions
ElectroShop is a complete E-Commerce system to easily start your online E-Commerce business. It has a powerful admin panel for managing products, categories, brand, orders, and much more. ElectroShop is extremely optimized for giving customers the best purchasing experience. The system is highly performant and protected against SQL injection, XSS, CSRF, and other attacks.
Some dependencies need to be maintained properly in a sequential order. Please try to follow that.
Log InHow to Use the eCommerce Platform
The following is a detailed guide on how to use the platform. After successfully setting up the project, you will need to organize your website. Here's what you need to do:
Go to www.example.com/admin/login.
Use the following credentials to log in:
Email: [email protected]
Password: 12345678
Admin Dashboard
After logging in, you will see a beautifully customizable admin dashboard, which will give you a brief overview.
Sidebar Menus
On the left side, you will see various menus that allow you to efficiently manage your website. Let's go over them one by one:
1. Users Menu
When you click on this menu, you'll see a "Manage" submenu. Upon clicking it, you’ll see a list of users who have ordered products from your website. This gives you access to customer leads. From this list, you can also delete customers if necessary.
2. Offline User Menu
The purpose of this menu is to register new customers directly from the admin panel. For example, if a customer is unable to place an order through the website due to some issue, they can call the admin, and the admin can place an order for them using this menu.
3. Category Menu
When you click on this menu, you'll see two submenus: "Add" and "Manage." In the "Manage" section, you can view, edit, or delete all categories. Since a data table is used here, you can perform real-time searches, sort columns, and download the information as PDF, CSV, or Excel files. You can even copy the data.
In the "Add" section, you’ll find an input form to add new categories by providing the category name. You also have the option to upload an image for the category.
4. Brand Menu
This menu works similarly to the Category menu. You'll see two submenus: "Add" and "Manage." In the "Manage" section, you can view, edit, or delete all brands. Like the Category menu, you can search in real time, sort columns, and download data in PDF, CSV, or Excel formats. You can also copy the data.
In the "Add" section, you can add new brands by providing the brand name. You also have the option to upload an image for the brand.
Product Menu
When you click on the Product Menu, you will see two sub-menus: "Add" and "Manage."
Manage Section
When you click on the "Manage" section, you will be able to view all products, as well as edit, delete, and view product details. Since a data table is used here, you can perform real-time searches, sort columns, and download data in PDF, CSV, or Excel formats. You can even copy the information. Pagination is also nicely implemented, displaying 10 products per page.
Add Section
In the "Add" section, you will find an input form to add a new product. After providing the required product details and submitting the form, the uploaded products will be visible to customers on the website.
Excel Upload
The purpose of this menu is to allow bulk product uploads. Suppose you have 2,000 products; uploading them one by one would take a lot of time. Instead, you can upload all of them at once using this Excel feature. In the "Manage" section, you'll see an interface where you can download a sample file by clicking Download Sample File. After downloading, fill in the data according to the instructions on the page. Once the file is ready, upload it via the browser and submit it. All products will be uploaded within minutes.
Order Menu
The Order Menu is where all the product orders from the website will be collected. From here, the admin can easily understand which customer has ordered how many pieces of a specific product. The admin can also search for specific orders. Each order is generated with a unique order ID. There are two additional buttons: Delete and View.
- View: Clicking on this will allow you to see the details of the order, and you can also download the invoice.
- Delete: Clicking on this will permanently delete the order, and the data will no longer be available.
In the Status column, there are three buttons: Pending, Completed, and Cancel. Initially, all orders will be in a pending state. Clicking on Pending will mark the order as completed, and clicking on Cancel will cancel the order.
Offline Order
This menu is used when a customer is unable to place an order themselves. In that case, the admin can place the order on behalf of the customer. Multiple orders can be placed from here as well.
Stock Report
The Stock Report menu shows a list of all products and their remaining quantities. If a product's quantity needs to be increased, clicking on Edit will take you to a form where the quantity can be updated. You can also search for the stock status of specific products. Additionally, you can download the data in PDF, CSV, or Excel formats.
Reports Menu
When you click on the Reports Menu, you will find three sub-menus: Sales Report, Sales by Product, and Customer Reports.
- Sales Report: This section includes a date range filter. By selecting a "From Date" and "To Date" and submitting the form, you can view all the orders placed within that date range, along with the total sales amount for that period.
- Sales by Product: In this section, you can see how many times each product has been sold and the total revenue generated from those sales. You can also search, filter columns, and download the data in PDF, Excel, or CSV formats, or even copy the information.
- Customer Reports: This section also includes a date range filter. By selecting a "From Date" and "To Date" and submitting the form, you can view all the customers who placed orders within that date range, along with the total sales made during that period.
Sliders Menu
When you click on the Sliders Menu, you will find two sub-menus: Manage and Add.
- In Manage, you can view all the sliders that have been added. You can edit, delete, and search for sliders.
- In Add, you will see two fields: The first field is for the image, and the second field is for setting the priority, which determines the display order of the images.
Side Banners Menu
When you click on the Side Banners Menu, you will find two sub-menus: Manage and Add.
- In Manage, you can view all the side banners that have been added. You can edit, delete, and search for banners.
- In Add, you will see two fields: The first field is for the image, and the second field is for setting the priority, which determines the display order of the images.
Mid Banners Menu
When you click on the Mid Banners Menu, you will find two sub-menus: Manage and Add.
- In Manage, you can view all the mid banners that have been added. You can edit, delete, and search for banners.
- In Add, you will see two fields: The first field is for the image, and the second field is for setting the priority, which determines the display order of the images.
Full Banners Menu
When you click on the Full Banners Menu, you will find two sub-menus: Manage and Add.
- In Manage, you can view all the full banners that have been added. You can edit, delete, and search for banners.
- In Add, you will see two fields: The first field is for the image, and the second field is for setting the priority, which determines the display order of the images.
Popup Banners Menu
When you click on the Popup Banners Menu, you will find two sub-menus: Manage and Add.
- In Manage, you can view all the popup banners that have been added. You can edit, delete, and search for banners.
- In Add, you will see two fields: The first field is for the image, and the second field is for setting the priority, which determines the display order of the images.
Terms and Conditions
You will only see the Manage sub-menu when you click on this menu. In the Manage section, there is a text editor where you can write the Terms and Conditions for this website in detail.
Privacy Policy
You will only see the Manage sub-menu when you click on this menu. In the Manage section, there is a text editor where you can write the Privacy Policy for this website in detail.
About Us
You will only see the Manage sub-menu when you click on this menu. In the Manage section, there is a text editor where you can write the About Us details for this website.
Settings Menu
When you click on this menu, you will see two sub-menus: Manage and Stripe Config. The Manage option allows you to add the website logo, footer logo, email, phone number, and social media links.
On the other hand, clicking on the Stripe Config button will allow you to set the Stripe payment gateway API key dynamically. This makes it easier for you, as an admin, to manage the Stripe configuration efficiently, giving you more control and saving time.
Other items by this author
| Category | Scripts & Code / PHP Scripts / Shopping Cart |
| First release | 29 September 2024 |
| Last update | 29 September 2024 |
| Software version | PHP 8.0, PHP 8.1 |
| Files included | .php, .css, .html, .sql |
| Tags | php, ecommerce, website, store, cms, inventory, laravel ecommerce, laravel crm, laravel cms, cms store |


