MoneyFlex - Money Management PHP ScriptMoneyFlex - Money Management PHP Script
Efficiently track your income and expenses with ease. Plan your monthly budget using our budget planner and achieve your goals witMoneyFlex - Money Management PHP Script
Efficiently track your income and expenses with ease. Plan your monthly budget using our budget p...
Overview
Introduction to MoneyFlex
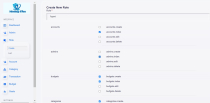
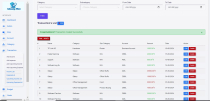
Welcome to MoneyFlex – your ultimate solution for efficient money management. This cutting-edge application empowers you to take full control of your finances with ease and precision. Built using the latest version of Laravel, MoneyFlex offers a seamless and user-friendly experience tailored to help you achieve your financial goals.
Key Features:
- Budget Setting:Define your financial targets and set personalized budgets to manage your expenses effectively.
- Expense Tracking:Keep a detailed record of your spending to ensure you stay within your budget and identify areas for improvement.
- Earnings Management:Log and monitor your income from various sources to get a clear picture of your financial health.
- Budget Setting:Log and monitor your income from various sources to get a clear picture of your financial health.
- Financial Situation Analysis:Gain insights into your financial status through comprehensive tracking and analysis tools.
- Report Generation:Create detailed reports to review your financial activities and make informed decisions.
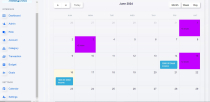
- Data Visualization:Understand your financial situation better with intuitive charts and graphs that provide a visual representation of your earnings and expenses.
Why Choose MoneyFlex?
- User-Friendly Interface: Our intuitive design ensures that managing your money is both simple and efficient.
- Advanced Security: With robust security measures in place, your financial data remains safe and secure.
- Customizable Settings: Tailor the application to fit your specific financial needs and preferences.
- Real-Time Updates: Stay up-to-date with real-time tracking and reporting features.
- Comprehensive Support: Benefit from our dedicated support team, ready to assist you with any questions or issues.
Start your journey to financial freedom with MoneyFlex. Track your earnings, manage your expenses, and make smarter financial decisions today. Let MoneyFlex be your trusted partner in achieving financial success
Features
FEATURES
- Standalone application
- Track Income
- Manage Budgets
- Consolidate all accounts in one place
- Monitor spending on the go
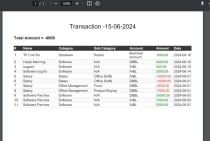
- Generate detailed reports
- Save money for goals
- Track Expenses
- Compare Expenses vs. Income
- Budget vs. Actual performance
- Forecast upcoming income
- Forecast upcoming expenses
Requirements
**Server Requirements**
- PHP 8.1 or higher
- MySQL 5.1 or higher
- Apache with mod_rewrite enabled
- Required PHP Extensions:
- Mcrypt
- MBString
- GD
- MYSQLi
- File Info
- PDO
- OpenSSL
- Zip
Please consult with your hosting provider to ensure these extensions are enabled. Generally, they are enabled by default.
Instructions
Install in Server
1. Containers :
To upload a zip file to your root directory, extract it, reconfigure the .env file, and import a database.sql file using drag and drop, you can follow these general guidelines. Note that specific steps may vary depending on your server setup and the tools available.
Upload the Zip File:
- Access your server's file manager or use an FTP client (e.g., FileZilla) to connect to your server.
- Navigate to the root directory of your web server (often public_html or www).
- Locate the zip file on your local machine.
- Drag and drop the zip file from your local machine to the root directory in the file manager or FTP client. This will upload the zip file to your server.
2. Extract the Zip File:
- In your server's file manager or FTP client, locate the uploaded zip file.
- Right-click on the zip file and select "Extract" or similar option. This will extract the contents of the zip file into the current directory.
3. Reconfigure the .env File:
- Locate the .env file in the root directory of your Laravel project.
- Right-click on the .env file and select "Edit" or use an editor like nano or vim to open the file.
- Update the database credentials (DB_HOST, DB_PORT, DB_DATABASE, DB_USERNAME, DB_PASSWORD) to match your server's database settings.
- Save the changes to the .env file.
                            <code>
                                DB_CONNECTION=mysql
                                DB_HOST=127.0.0.1
                                DB_PORT=3306
                                DB_DATABASE=your_database_name
                                DB_USERNAME=your_database_username
                                DB_PASSWORD=your_database_password

                            </code>
4. Import the Database:
- Access phpMyAdmin or your preferred database management tool.
- Create a new database if one does not already exist.
- In phpMyAdmin, select the newly created database.
- Look for an "Import" option and click on it.
- Click on "Choose File" and select the database.sql file from the extracted zip folder.
- Click on "Go" or "Import" to import the database.
5. Verify Changes:
- Visit your website to ensure everything is working correctly.
- Test the database connection by interacting with your application.
***Note: Please ensure you have backups of your files and database before making any changes to avoid data loss
Install in Local
Installing Locally with XAMPP
Step 1: Install XAMPP
- Download XAMPP from the official website: XAMPP Download.
- Install XAMPP by following the on-screen instructions.
Step 2: Install Composer
- Download Composer from the official website: Composer Download.
- Install Composer by following the instructions for your operating system.
Step 3: Download the Laravel Project
- Receive the Laravel project zip file and the .env file from the sender.
- Extract the contents of the zip file to a directory of your choice.
Step 4: Set Up the Database
- Create a new database in phpMyAdmin.
- Navigate to the project directory.
- Go to .env file
- Update the .env file with your database credentials:
                                                        <code>
                                                            DB_CONNECTION=mysql
                                                            DB_HOST=127.0.0.1
                                                            DB_PORT=3306
                                                            DB_DATABASE=your_database_name
                                                            DB_USERNAME=your_database_username
                                                            DB_PASSWORD=your_database_password

                                                        </code>
Step 5: Import the Database:
- Access phpMyAdmin or your preferred database management tool.
- Create a new database if one does not already exist.
- In phpMyAdmin, select the newly created database.
- Look for an "Import" option and click on it.
- Click on "Choose File" and select the database.sql file from the extracted zip folder.
- Click on "Go" or "Import" to import the database.
Step 6: Run the Development Server
- Start the Apache and MySQL services in XAMPP.
- Run the Laravel development server:
-
<code>php artisan serve</code> - Access your Laravel application in your web browser at http://localhost:8000.
This guide should help you set up a Laravel project locally using XAMPP and the provided .env file. If you encounter any issues, feel free to ask.
|
PHP Script Installation Service
Don't worry about the installation of your script! Have your PHP Script installed for you.
|
$39 | Buy now |
| Category | Scripts & Code / PHP Scripts / Miscellaneous |
| First release | 15 June 2024 |
| Last update | 15 June 2024 |
| Software version | PHP 8.1, PHP 8.2, PHP 8.3 |
| Files included | .php, .css, .html, .sql, .xml, Javascript .js |
| Database | MySQL 4.x, MySQL 5.x |
| Tags | money management, expense tracker, budget planner, expense management, income tracker, personal finance |


