Image Converter - Android App TemplateImage Converter - Android App Template
Image Converter - JPG | PNG | BMP | JPEG, Create Stickers, JPG To PNG ConverterImage Converter - Android App Template
Image Converter - JPG | PNG | BMP | JPEG, Create Stickers, JPG To PNG Converter
Overview
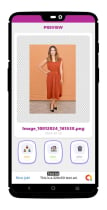
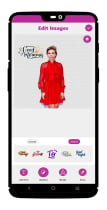
This is an application that converts images to JPEG or PNG format. PNG, BMP, JPEG images are supported by this app. JPEG image extension can be selected from ".jpg" and ".jpeg". When saved in JPEG format, the transparent color is converted to white.
Steps to convert image file format are:
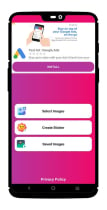
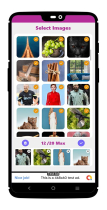
- Select any type of Photo to convert into image
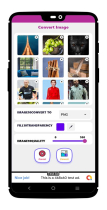
- Save as JPG, JPEG, BMP, PNG file format
- Converted Image file Info
- Converted Image Gallery (including Share & Delete)
Apk Download Link:-

Features:-
- Save into Gallery all converted images
- Easy to share, delete converted JPG, JPEG and PNG images
- Choose image output format (jpeg, png, jpg, bam).
- You can share directly from the view images in converted images and from converted gallery as well.
- JPG to PNG and PNG to JPG converter
- Image to JPG
- Image to PNG
- Image to BMP Converter
- Efficiency and Speed
- User friendly beautiful UI design
- Maximum privacy
- Smooth animations
What You Get:-
- Full android source code
- Admob ads integration
- Supported all latest android 13 device
- Full Document with Screen Shot.
Requirements
Technical Requirements:
1. Operating System:
- Android 5.0 (Lollipop) or higher (recommended for better performance and compatibility with latest features).
2. Development Environment:
- Android Studio: Integrated development environment (IDE) used for app development.
3. Programming Languages:
- Java/Kotlin: The primary programming languages for Android app development.
4. Libraries and SDKs:
- AdMob SDK: For integrating ads.
- Android Support Libraries: To ensure compatibility with various Android versions and devices.
5. Screen Sizes and Orientations:
- Responsive Design: Support for multiple screen sizes and orientations (portrait and landscape).
Hardware Requirements:
1. Minimum Device Specifications:
- Processor: ARM or x86 architecture.
- RAM: Minimum 1 GB of RAM (2 GB recommended for better performance).
- Storage: Sufficient storage space for app installation and saved images (at least 100 MB).
2. Device Compatibility:
- Phones and Tablets: The app should be compatible with both phones and tablets of various sizes.
Features and Functional Requirements:
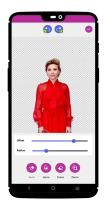
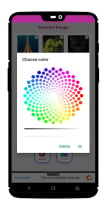
1. Color Picker Tool:
- Ability to select colors with transparency options.
2. Zoom and Move Functionality:
- Multi-touch support for zooming and moving images.
3. Saving and Sharing:
- Options to save colored images to a gallery and share them with other apps.
4. User Interface:
- Clean, user-friendly UI with smooth animations.
5. Privacy:
- Ensure user data privacy and security.
Additional Requirements:
1. Ad Integration:
- Proper configuration and setup of AdMob ads.
2. Documentation:
- Comprehensive documentation including setup instructions, screenshots, and customization guides.
3. Testing:
- Extensive testing on various devices and screen sizes to ensure compatibility and performance.
4. Compliance:
- Adhere to Google Play Store policies and guidelines for app submission and updates.
Instructions
1. Setup Instructions
1.1. Download and Install
1. Download the APK:
- Obtain the APK file from the provided link or your source.
2. Install the APK:
- Transfer the APK to your Android device if needed.
- Open the APK file on your device to begin installation.
- Follow the on-screen prompts to complete the installation.
1.2. Set Up the Development Environment
1. Install Android Studio:
- Download and install Android Studio from the [official website](https://developer.android.com/studio).
2. Open the Project:
- Launch Android Studio.
- Select `Open an existing project` and navigate to the project directory of your app.
- Click `OK` to open the project.
3. Install Required SDKs and Libraries:
- Ensure that you have the latest SDKs installed.
- Install the AdMob SDK if not already included in your project.
2. Customization Instructions
2.1. Modify Code
1. Access Code Files:
- Navigate to the `src` directory in Android Studio to access Java or Kotlin files.
- Modify the code as needed for your custom features or changes.
2. Edit Layouts and UI:
- Open XML layout files in the `res/layout` directory to customize UI elements.
- Adjust properties and styles to fit your design preferences.
3. Update Color Palette:
- Modify color resources in `res/values/colors.xml` to change the color options available in the app.
2.2. Configure AdMob
1. Set Up AdMob Account:
- Create an AdMob account if you don’t already have one.
- Add your app to the AdMob dashboard and obtain ad unit IDs.
2. Integrate AdMob in Code:
- Replace placeholder ad unit IDs in your code with the ones obtained from AdMob.
- Follow AdMob integration guidelines to ensure proper implementation.
3. Testing Instructions
3.1. Run the App
1. Build and Run:
- Connect an Android device to your computer or use an emulator.
- Click the `Run` button in Android Studio to build and deploy the app on the device/emulator.
2. Test Features:
- Verify that all features (e.g., color picker, zoom, save, share) function as expected.
- Check for smooth animations and responsiveness on various devices.
3.2. Debugging
1. Use Logcat:
- Open the Logcat window in Android Studio to view logs and debug messages.
- Address any errors or warnings shown in the logs.
2. Perform Usability Testing:
- Conduct testing with real users (e.g., children) to gather feedback on usability and design.
4. Deployment Instructions
4.1. Prepare for Release
1. Generate a Signed APK:
- Go to `Build` > `Generate Signed Bundle / APK`.
- Follow the wizard to create a signed APK file for release.
2. Test Release APK:
- Test the signed APK on various devices to ensure it works correctly.
4.2. Publish to Google Play Store
1. Create a Google Play Developer Account:
- Register for a Google Play Developer account if you don’t have one.
2. Submit the App:
- Go to the Google Play Console and create a new app listing.
- Upload the signed APK, provide necessary details (e.g., app description, screenshots), and follow the submission process.
3. Monitor and Update:
- Monitor app performance and user feedback via the Google Play Console.
- Update the app as needed based on user feedback and new feature requests.
5. User Instructions
5.1. Using the App
1. Start Coloring:
- Open the app on your device.
- Select a picture from the gallery or available options.
2. Choose Colors:
- Use the color picker tool to select colors with desired transparency.
3. Draw and Color:
- Tap or drag on the image to color different segments.
4. Save and Share:
- Save your masterpiece to the gallery or share it with other apps using the provided options.
5. Zoom and Move:
- Use two fingers to zoom in, zoom out, or move the image for better coloring control.
By following these instructions, you should be able to set up, customize, test, and deploy the drawing and coloring app effectively, ensuring it meets the needs of its young users.
Other items by this author
|
Android App Reskin Service
Have your App reskinned to meet your needs.
|
$199 | Buy now |
| Category | App Templates / Android / Applications / Photo |
| First release | 13 January 2024 |
| Last update | 13 January 2024 |
| Operating Systems | Android 7.0, Android 8.0, Android 9.0, Android 10.0, Android 11.0, Android 12.0 |
| Files included | .cpp, .apk, .java, .xml |
| Tags | create stickers, image converter - jpg|png|bmp|jpeg, jpg to png converter |


